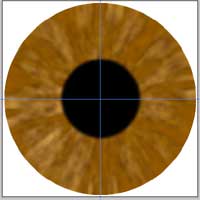
1. At this point you may want to create a layer for your pupil. You will need it there as a guide for the next couple of steps.
2. With the last layer that you created selected, click on the "new layer" icon at the bottom of the layer palette. Name it "pupil."
3. You may want to display your grid lines for this step. View Menu ->Show Guides
4. Restore your foreground and background colors to their default black and white by pressing on the "d" key on the keyboard.
5. Press ctrl-d to deselect the iris selection.
6. Select your elliptical marquee tool from the tool palette.
7. Place the cursor where the gridlines cross over and while holding down the shift and alt keys, drag to the right to make the selection area for your pupil.
8. Let go of the mouse button and the keys. Pick the Select Menu -> Feather and type in the amount of 3. Press OK.
9. Hold down the alt key and press the backspace key. Your pupil should be filled with black now. (Figure 16)
10. Selection -> Save Selection and name it pupil in the name field.
11. Keep this selection active for the next layer.
12. If you want you can turn off the guides.
