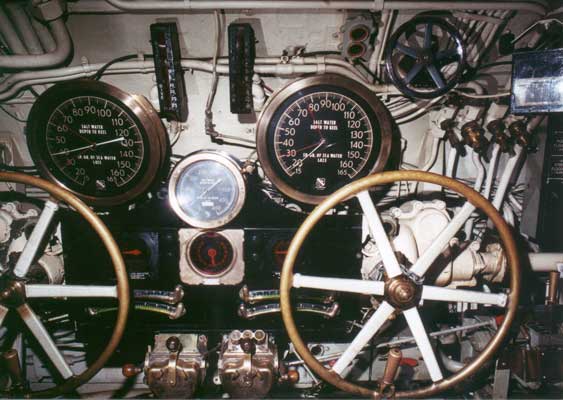
This compartment is the heart of the submarine. The two large brass wheels on the port side in the center of the Control Room plus the two little handles between the wheels, the depth gauges and gauges for telling angles of the boat were all used and operated by two men, the Bow Planesman and the Stern Planesman. They worked as a team to control the depth of the submarine when submerged.
The little black box hanging from the overhead in the upper right of the image below, is called a Bathythermograph. Although this device does not look very important it remained a military secret for some time after the end of WW-II. This instrument simultaneously records both the depth and temperature of the water just outside the submarine. A 'kink' in the line being drawn as the submarine changes depth indicates a 'thermocline' or region of large temperature change. Sound waves are deflected by thermoclines so a submarine can sometimes hide beneath them out of 'sight' of the probing 'pings' from an enemy's sonar.
The large brass wheel forward and centered in the Control Room (just visible on the right in the B&W 1945 photo) was used for steering when under depth charge attack and running silent. This large brass wheel along with the two large wheels for the Bow Planes and Stern Planes, were also brought into use under these conditions. This was very hard and hot work. The noisy ventilation system would be shut off and temperature of 130 degrees and higher were not uncommon. This ordeal sometimes lasted as long as thirty hours.
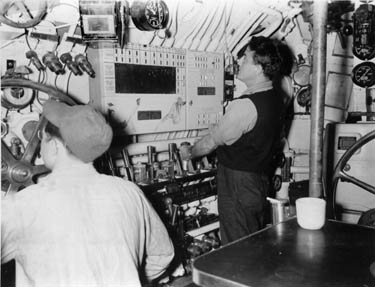
The photo below, taken during WW-II, shows two crewmen operating Cod's bow planes and the Main Ballast Control panel (known as the "Christmas Tree" because of its red and green indicator lights). Pulling the levers causes the vents at the top of the ballast tanks to open which results in water flooding the vented tanks and thus causing the submarine to loose buoyancy and dive.
The Vargas Girl "pinups" seen on the front of the ballast control panel were not Navy issue but were commonly added by the crew throughout the boat to "remind them of why they were fighting".
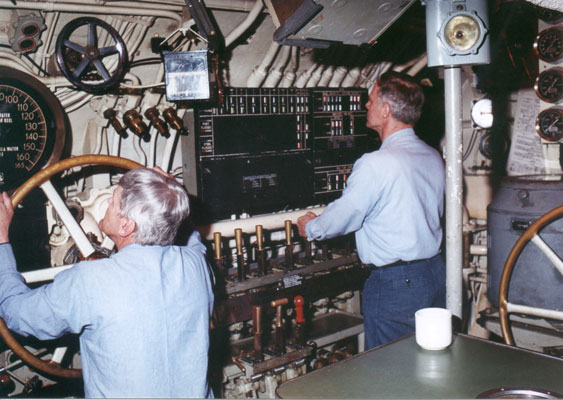
The photo below shows the same area of Cod as she looks today -- more than 50 years later.
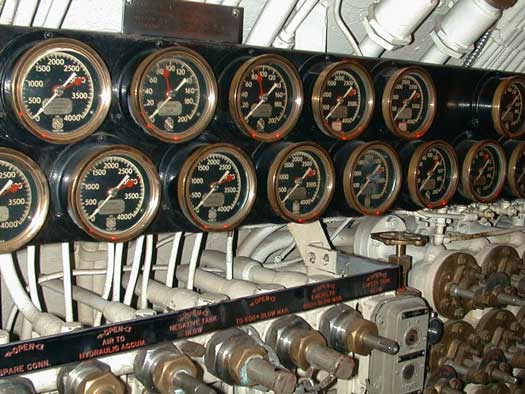
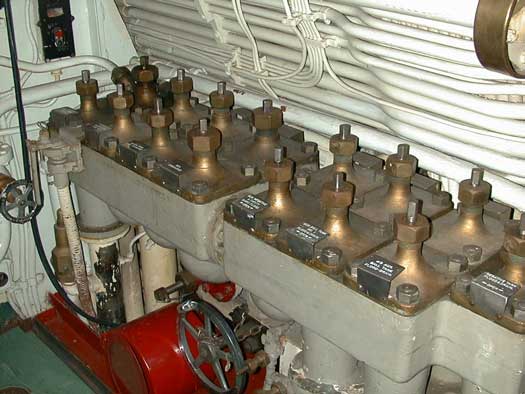
This compartment also contains the controls for forcing air back into the ballast tanks and thus pushing out the water. This causes the boat to again become buoyant enough to rise to the surface. The photo below shows a portion of the high pressure blow manifold and the associated pressure gauges. Note that many of the gauges are "red lined" at 3,000 psi (pounds per square inch).
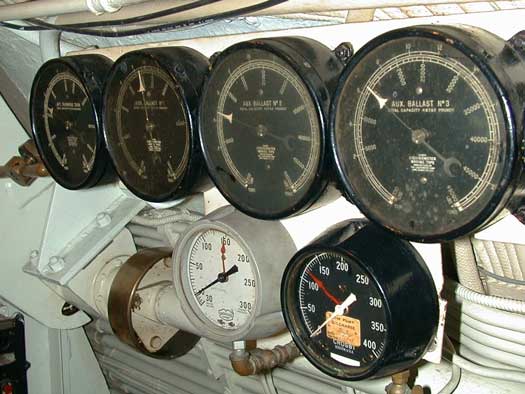
Maintaining the submarine in a level condition and adjusting the overall weight of the submarine is accomplished by shifting water among various special tanks and the sea. The Trim Manifold located in this compartment provides the means for directing the appropriate amount of water between these tanks and/or the sea. The water is moved by the Trim Pump, located in the lower section of this compartment just below the Trim Manifold . The two images below show the gauges that tell how much water weight is in each of these tanks (in thousands of pounds), and the Trim Manifold that controls the way the various tanks are connected together to make the adjustments in weight.
Also located just inboard of the diving station is the ladder to the Conning Tower. Located in the Conning Tower are the two periscopes, the Torpedo Data Computer, the RADAR and SONAR consoles, and the control panel for firing the torpedos.