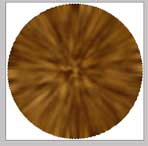
1. Create a new layer. I just called this one Dark Brown. Use the same brown color that you did in created the previous layer, RGB 68, 40, 11. Press alt and backspace to fill the circular area with the dark brown color.
2. Press ctrl-d to deselect your iris selection. We can get it back later by doing a load selection and selecting the iris selection you saved earlier.
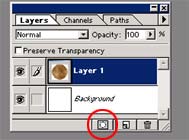
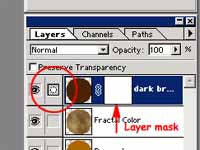
3. Create a layer mask for this layer by clicking on the "Create Layer Mask" icon at the bottom of the layers palette (it is the icon immediately to the left of the "Create New Layer" icon - See Figure 7). Now all of the steps that you do in this layer will actually be being applied to your layer mask and not to the actual layer itself. Explaining what a layer mask is and how it works is beyond the scope of this tutorial. You may want to read about it either in your Photoshop manual or in a Photoshop tutorial book. What I will say, though, is as you can see in this layer you have 2 image icons. The one on the left is the image layer portion and the one on the right is the layer mask. Right now the layer mask should be all filled with white. The little icon next to the eyeball icon on that layer should show a circle. (See Figure 8) That means that you are in the layer mask and anything that you do will affect the layer mask. If you click on the image icon in the layer, that little icon will change to a paintbrush. That means whatever you do will affect the actual image layer. So make sure you are in the layer mask by looking at that icon. If it is a paintbrush, then click on the layer mask icon in that layer to change that little icon to a circle. (Figure 8 again)
4. Select the Filter menu -> Noise -> Add Noise. Amount = 115. Click OK.
5. Select the Filter menu -> Blur -> Gaussian Blur. Amount = 4.4.
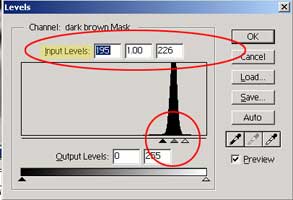
6. Select the Image menu -> Adjust -> Levels. You need to move the little triangles underneath the levels histogram. Move the left one very far to the right and the one on the left should be moved just a bit to the left. The one in the middle moves automatically. The input levels should read approximately 195, 1.00, 226. (Figure 9) Click on OK.


8. Do another levels pass on this: Select the Image menu -> Adjust -> Levels and squeeze in the little triangles until your input levels are 68, 1.00, 170.
