1. And now for the final step - yeah!
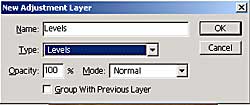
2. Create an adjustment layer underneath the iris ring layer but on top of the light ring layer (click on the light ring layer to select it). You do that by clicking on the "light ring" layer and then selecting the arrow at the top right of the layer palette and select the "New Adjustment layer" option. When the dialog box pops up take the "levels" option at the "Type" drop down menu. (Figure 22) Click on OK
3. When the levels dialog box comes up set the input levels to: 52, 1.41, 229. Click on OK.
4. I did this to give the contrast some oomph.
5. Voila!
Another thing you may want to do before you use the image map is to sharpen the image a tad with the "unsharp mask" filter. You would do this after you flatten the image since the filters will only affect the current layer when you run them.
Your done! Make sure you save the file.